
Student (credential) card
Automatic translation. View original
- How to acquire student ID cards?
- How do I enable the student ID card for a student?
- How does the student access the ID card?
- How to view the student's ID card
- ID card validation
Questions? Get in touch I know: Contact
How to acquire student ID cards?
You buy the ID cards at the affiliation. You do not need to indicate the students or their data at the time of purchase, only the quantity of ID cards you want.
After purchase is made, we will release in your Learn account the quantity of purchased ID cards for you to enable to the students you wish. This will be done when the Publisher notifies us of your purchase, for now it is not automatic. (For Argentine affiliation it is already automatic)
You do not need to indicate the students at the time of purchase. You buy a number of ID cards and they remain available until you enable-them for a student. (See how to do this below)
How do I enable the student ID card for a student?
Student's first ID card
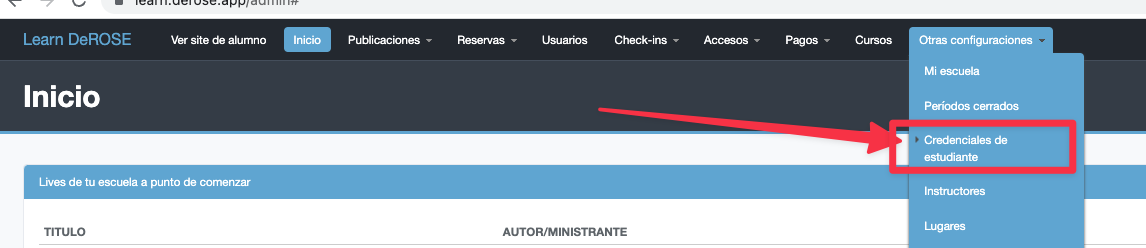
You release it from the advanced Learn panel, in the option “Other settings > Student ID cards”
With the button “Assign credential to a student” you activate the credential for some student. See that there is a number in parenthesis. This indicates how many credentials you have available.
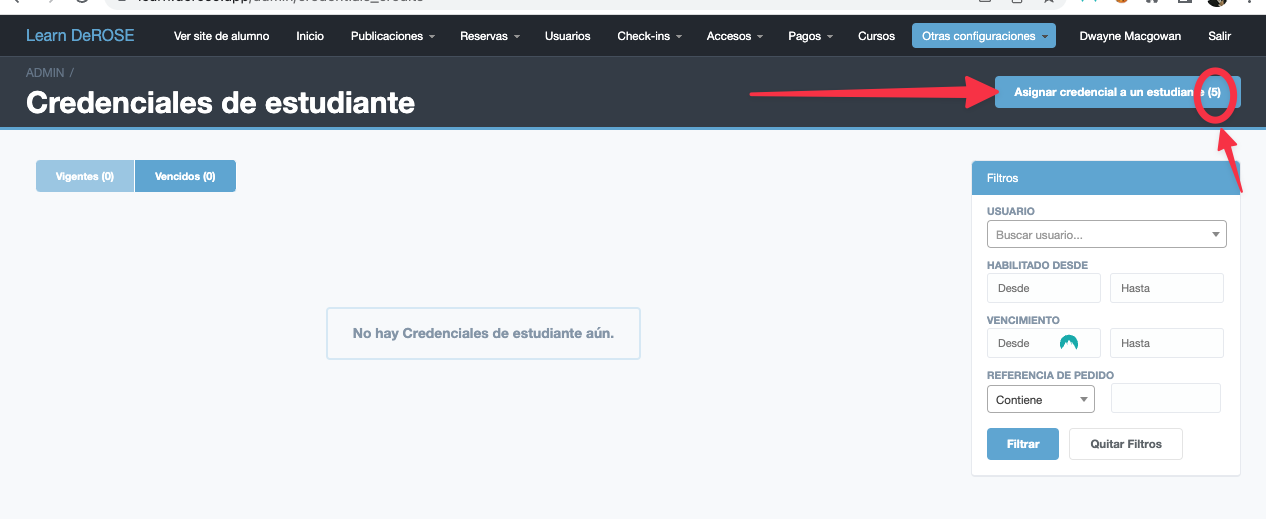
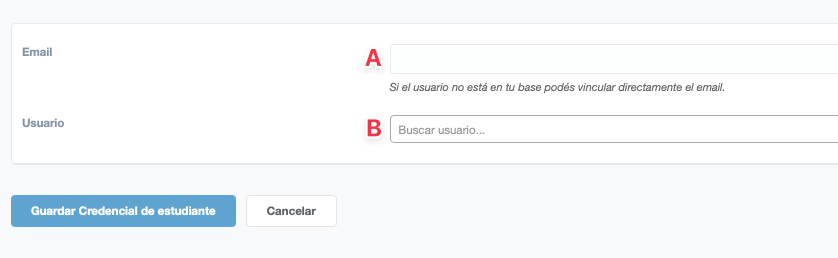
By clicking the button in the form there are 2 options.
A) If the student is not yet registered in Learn enter the email and when they register with that email the ID card will be released to them.
B) If the student is already registered select the student and save to release the ID card.
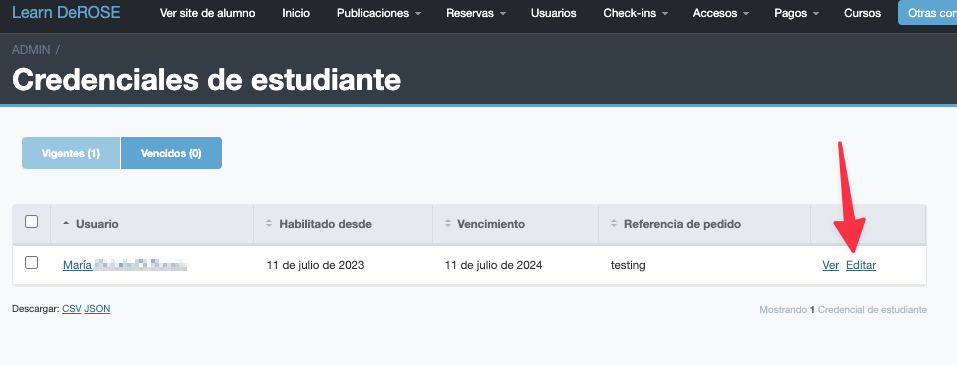
Ready! The student must appear in the “Active” tab.
If you made a mistake and want to change the student of the card, you can do it-by clicking on "edit".
You have 2 days to change it, after that the student of the card can no longer be modified.
Step-by-step video:
How to register the data for the card?
=== SCHOOLS WITHOUT PADMA ===
Name: The name comes from the data that the student entered in Learn.
Photo: The photo is the one that the student uploaded to Learn. If the student doesn't upload, the photo is the one you uploaded in Padma.
DNI / CPF / Identity: This data comes directly from Padma.
Grade: The grade comes from PADMA.
=== SCHOOLS WITH PADMA ===
Name: The name comes from the data that the student entered in Learn.
Photo: The photo is the one that the student uploaded to Learn.
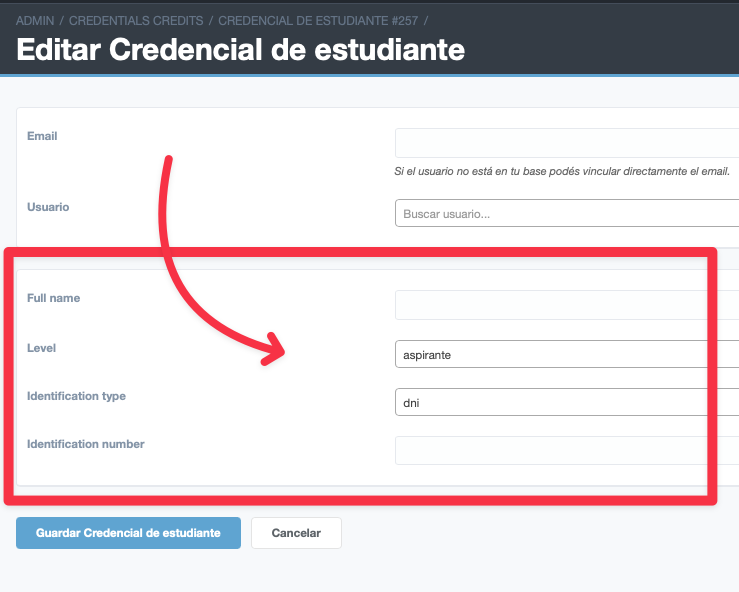
DNI / CPF / Identity: You register these data when activating the card.
Grade: You enter the grade when activating the card.
Renewal
To create a card for a student who already had a card, just access the “To renew” tab and click on renew.
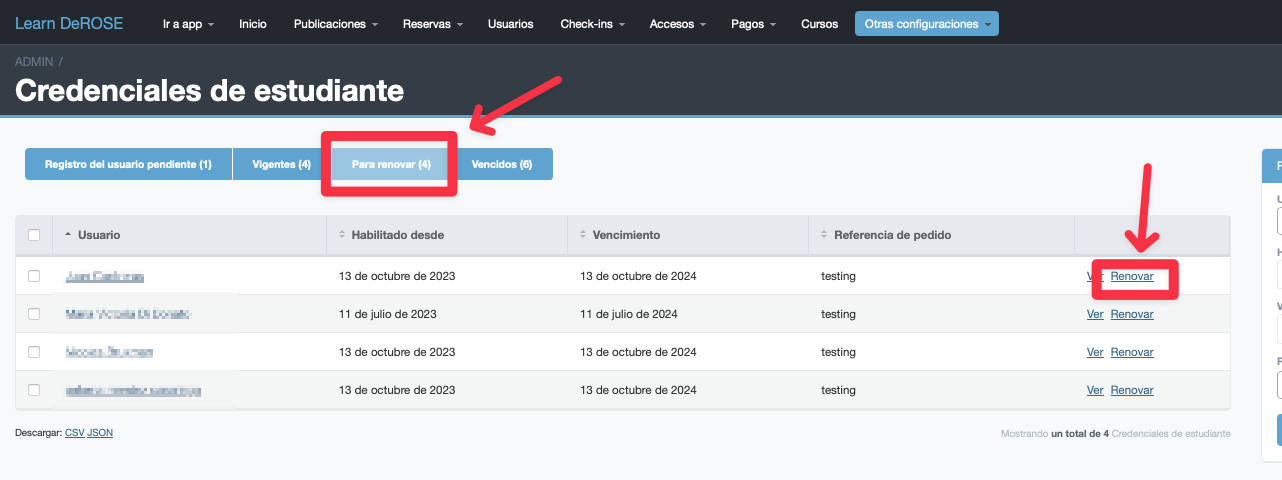
The renew option will only be available if you have available free cards.
How does the student access the student ID?
To access the student ID, the student must have a user account on Learn.
To access the student ID, the student must have a user account on Learn; if the school has PADMA, they must be registered as a student in PADMA and you must have enabled their student ID.
This is important for the security of the school and the student. Registration in PADMA ensures that if they become an ex-student-the student ID is automatically disabled upon deregistration in PADMA, and registration on Learn ensures that only the student has access to their credential and it does not remain public on the web for anyone to access their data.
The student can find the student ID on their Learn profile
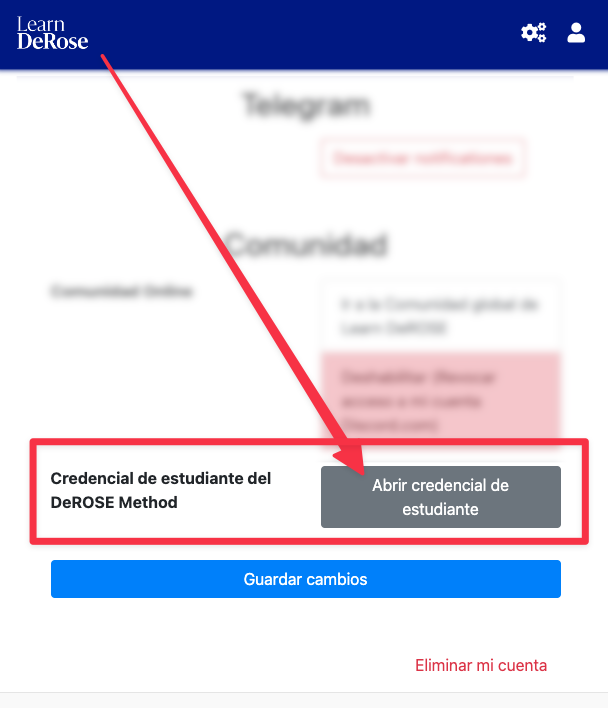
They can access it-directly via the link you can share with them:
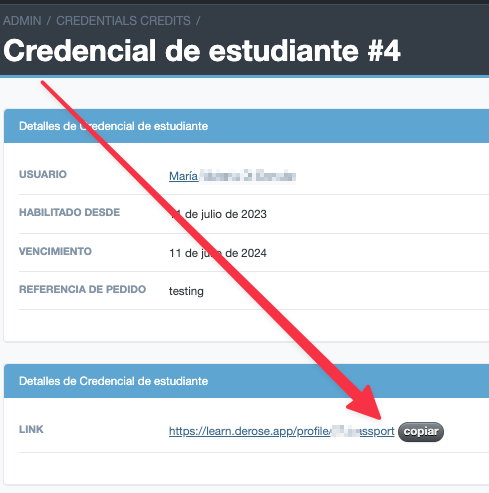
How to view the student's student ID
They can access it-directly via the link you can share with them:
Validation of the student ID
At first, validation of the student ID validity would not be necessary since upon expiration the student automatically loses access. But there is the possibility that someone presents an old screenshot of the student ID or generates a fake student ID.
To ensure that a student ID is not fake, there is the "verify". button; by clicking it, a QR will be displayed in place of the photograph.
This QR must be scanned from the Learn instructor App: https://learn.derose.app/teacher_panel/qr_reader